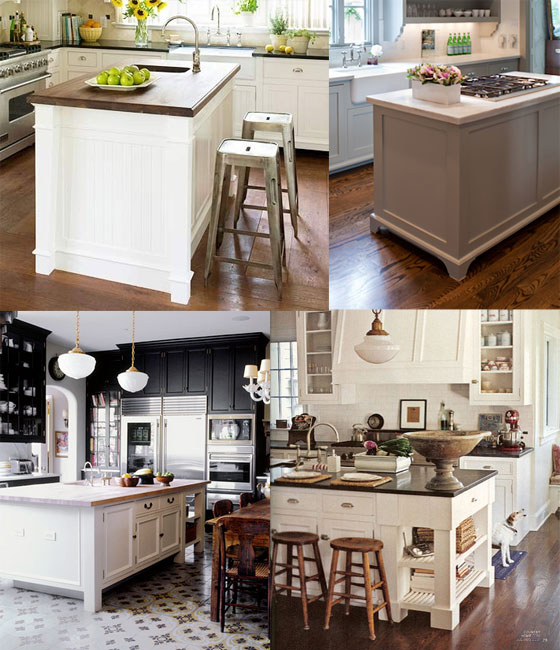
As a person who enjoys construction and DIY, I feel slightly guilty to admit that I did not DIY the big beautiful new island now sitting in my kitchen. I had planned to build it myself. I pinned lots of inspiration to my kitchen Pinterest board, took measurements and drew plans, but when it came time to put saw to wood, I wimped out.
My original plan was to find a second-hand kitchen that had cabinets that could be reconfigured into an island. However, weekly visits to the Habitat for Humanity Restore did not reveal a suitable candidate and made me realize that any reconfiguration would not be straight forward. Then, one day at the Restore I found eight cabinet doors with cathedral arch tops that mimicked the style of our kitchen cabinets. I bought the doors, came home and drew up a plan.
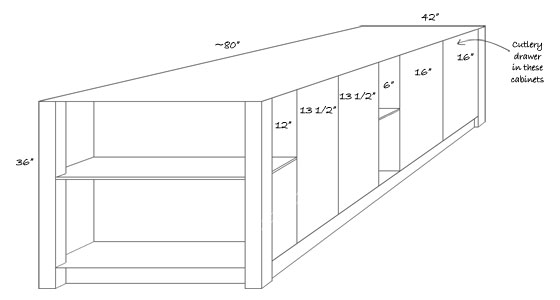
Once I sketched the plan, I realized that I simply needed four cabinet boxes and two sections of open shelving. Simple! My Dad and I could build it ourselves over the Christmas holidays!
That plan was discarded after my Dad and I spent the holidays building the TV cabinet, and I decided furniture construction is neither my best skill nor my favourite way to spend my days.
It was time for some professional help. I called my Dad’s kitchen guy and emailed him my sketch and my inspiration photos. There was a bit of sticker shock when we received the quote, but I’d already made up my mind that DIYing a kitchen island wasn’t for me, so we decided to go ahead.
We saved some money by using the doors that I’d bought at Habitat (for $5 each) and eliminating the corner posts that I’d drawn on my original design in favour of basic cabinet boxes. However, we balanced that out by paying our cabinet maker to spray the doors white, rather than painting them ourselves.
I don’t have a good excuse why I wasn’t in the mood to DIY.
However, on the bright side I did eventually return to my normal self.
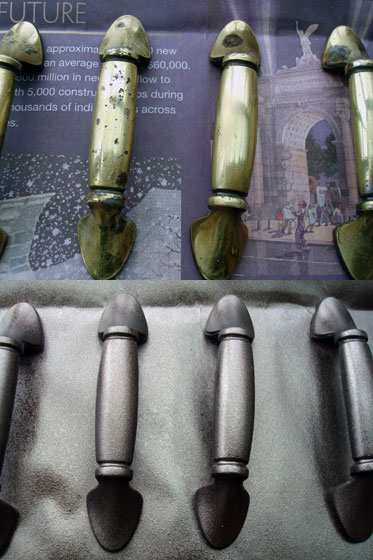
Habitat was also my source for cabinet pulls. I found handles that matched the existing ones in the kitchen for just 50 cents each. I hopped on the ORB (oil rubbed bronze) bandwagon, spray painting all of the handles, including our very chipped original ones.
I knew things were definitely back to normal on the DIY front when I decided to make the wooden countertop myself. That’s a story for next week, though.
Is there anyone else out there who’s gone through a DIY slump? How did you get through it? Who else is an ORB fan? How do you decide what to do yourself and what to hire out?

I am really wanting to start a DIY project and I just can’t find the project I want to tackle.
We just started changing our hardware to oil-rubbed bronze. I really love it, but I hope it is not just a phase that goes out of style. I really do not like bright brass and silver is too commercail or industrial for me. Do you mind me asking what paint you used? Is it a two (or three) step process? I am wanting to try to match the things we bought with things we already have.
I used Rustoleum Universal Advanced Formula. It has a paint and primer in one according to the can. I referred to this tutorial from YHL http://www.younghouselove.com/2012/12/you-down-with-orb-yeah-you-know-me/.
First step was washing the handles in hot soapy water–I even scrubbed with a brush, as the handles were super greasy. Then I sanded them with really fine sand paper (I think 500 or 600) and wiped them down with a dry rag. I didn’t use the deglosser like Sherry did.
Finally I painted. Lots of really thin coats spaced about 10-15 minutes apart. I probably did 6 or 7 coats in the end. I let them dry for 48 hours before I put them back on the cabinets.
We’ve only been about a week with our new handles. So far they seem to be holding up well, and I really like the finish–it’s a very dark black-brown with a slightly metallic tone.
Good luck with the hardware switch and with finding the right DIY project.
THANK YOU! I am going to search for ORB paint tonight!
I used ORB on lots of hardware things at my big house when I was getting ready to sell. Things like closet knobs (wood or metal, they all matched) and even our fireplace glass door frame were massively improved. (Except when Sharon ran over it in the driveway after I’d just finished laboriously taping and painting and was letting it dry in the sun. Even fireplace glass has a breaking point…and $300 later, so did my appetite for DIY…)
Sharon!!! Don’t you know the driveway is for DIY and not driving!
LOL – both of us! Sharon is hanging her head in DIY shame. 😀