Upgrading our leaky hot water tanks to fibreglass

“So you find that ominous puddle of water beneath your hot water heater. As you thoughtfully mop up the floor, … you are faced with one of two courses of action. The first, and… most soul-satisfying action would be to tear the unit bodily from the fittings and heave it lustily into the trash heap. But as your arms flex under this thought stimulus, you question your physical ability to perform this feat with all the zest and spontaneity the occasion requires. After all you are not as young and husky as you once were.”

Alfred J. Taylor in Popular Home Craft, February 1945

I received a copy of this magazine over the weekend, and it contained the article “Make That Water Heater Last.” The article talks of the demands of the Second World War and the impossibility of finding a plumber or buying a new heater when the old one starts to leak. It gives practical advice about how to “fortify your resolve” and “fix it yourself and make do.”

But beyond all of that, it is so well-written. The sentences are beautiful and funny. I couldn’t resist borrowing some of Alfred J. Taylor’s words to start this blog post, even if we did not have to make do when our “faithful old tank[s]” started to leak last year.

I’ve scanned the whole article to share it with you, in case you want a glimpse into home repair circa 1945 (don’t miss the last line… or the last two paragraphs… you know what? Just read the whole thing).

When we moved to the farm, we upgraded pretty much every system in the house. As part of our new geothermal heating and cooling system, we got two new hot water tanks. But within a few months of installing them, our hot water got super stinky. We didn’t want to shower it was so bad.

After a bit of online research I was able to figure out that the anodes in the tanks had likely become home to some malodorous bacteria. We decided to have the anodes removed, and our odor problems went away.

But a new problem arose. Without the anodes, the tanks were more susceptible to rust and likely wouldn’t last as long.

Last summer, we noticed some seepage around the bottom of the tanks. They had lasted just over 7 years before rusting out.

Leaking hot water tank

We started investigating our options and getting quotes.

Ultimately, we decided to go with one of the options our geothermal company had offered when they were fixing our stinky water issues: two new anode-less fiberglass tanks.

Rheem Marathon hot water heaters

Not the cheapest solution, but hopefully the longest lasting one.

(For those asking, “What about tankless?” I don’t like tankless water heaters. I’ve used them a few places and the water never gets hot enough for me. I like my showers to be scalding. Also, our geo system generates some excess heat, which is captured by our dual tank system, so we feel like we’re pretty efficient and environmentally friendly right now.)

I often joke that we have a science experiment in our utility room between the water treatment system and the geothermal. Now we have two spacecraft as well with these capsule shaped tanks.

(And for Mr. Taylor, with his iron cement and assorted wrenches, thank you for your encouraging, educational and entertaining article.)

Cold snap

December snowfall

Our first significant snowfall and cold snap arrived this week. As it happens, they coincided with a hiccup in our heating system.

When we woke up on Tuesday morning, the temperature inside was down to 13 degrees (55 fahrenheit). Outside it was -5. Brrr.

Thermostat showing 13 degrees

Definitely a day for breakfast in bed under the covers.

Baxter eating under his blanket in bed

Fortunately, a service tech from our geothermal company (Waterloo Energy Products) arrived by 8am and by 8:30 the heat pump was chugging again.

It turned out we needed a new capacitor (the cylinder in the centre of the photo below), which is apparently a fairly inexpensive part (we haven’t received the invoice yet).

Inside the geothermal heatpump

We’ve had our geothermal system for more than five years, and we’ve been really happy with our choice to go geo. While at first we knew next to nothing about geothermal, now we’re huge endorsers of this system.

While he was here the tech checked the rest of our setup and everything seemed to be in good shape. Which is good as the cold snap is continuing. Yesterday was -18 but felt like -27. Yipes.

Baxter has yet to take his turn at serving breakfast in bed.

Eco incentive

These days, there are numerous programs where people can access government grants to help make their homes more energy efficient.

When we bought the farm, Matt and I were able to qualify for the ecoEnergy retrofit program through the Government of Canada. Knowing that we had a long list of repairs that we needed to do, including improving the insulation in the house and replacing the furnace and air conditioning system, we were looking for any help we could find.

The ecoEnergy program “provided grants up to $5,000 to help homeowners make their homes more energy-efficient.” Ummm, $5,000 is pretty helpful!

The challenge for us with the ecoEnergy program was that it had a very tight deadline: the end of March 2012. We only took possession of the farm on March 2, so as soon as our offer was accepted in January, we went to work to get things in place to qualify for our grant.

Step 1: Register for the program.

A registration number was required for all steps of the program. Registration was free and easy to do online. By requiring homeowners to register in advance, the government could manage the budget for the program; there was only space for 250,000 homeowners to participate. I registered the farm on Jan. 27. The program reached its cap and stopped accepting registrations the very next day. This was just one of many times where I felt fate was on our side with this property.

Once we had registered, we were in a bit of a holding pattern. While we were able to enroll in the ecoEnergy program before we officially owned the farm, inspections and any actual work had to wait until the deal closed on March 2. But, March 31 was the deadline to complete any upgrades. We would have just 29 days to do all of the work. That meant I spent February finding an inspector to do our pre-retrofit evaluation, getting quotes for our geothermal system and insulation upgrade, hiring contractors and scheduling everything so that we were ready to go as soon as the farm was ours.

Step 2: Pre-retrofit evaluation

Before we did any work, we had to have the house inspected by an inspector licensed by Natural Resources Canada. We chose to go with Energuy. The pre-retrofit inspection was scheduled for 12 noon on March 3, the day we officially took possession.

Energuy inspector

Serge, one of our inspectors from Energuy

The inspector looked through the house from the attic to the foundation, documenting the insulation, the furnace and air conditioner, the hot water tank, the windows and the toilets (the areas that were eligible under the terms of the program). With the help of a big fan he put in the front door, he also performed a blower test which showed any air leaks that we had in the house. He also helped us fill out all of the paperwork required by the program.

Blower test for an energy audit

The blower test fan set up in the front door

At the first inspection, our house received a rating of 58 points (out of 100) on the EnerGuide Rating System (ERS) scale. The ERS compares the our home’s efficiency with other similar houses by estimating our annual energy consumption based on our house’s “location, size, mechanical equipment and systems, insulation levels and air tightness.”

According to Energuy, the average rating for a house like ours is 64. So we weren’t too far below the average, but that wasn’t much comfort to this over-achiever.

Step 3: If we wanted to improve our rating, we one option: Do the work

Obviously, the biggest upgrade we were making was the geothermal system. Installation started on March 5 — 26 days left in the program. The attic insulation was upgraded on March 16 — 15 days to go. And then just under the deadline, on March 25, we bought two new low-flow toilets — 6 days to complete install!

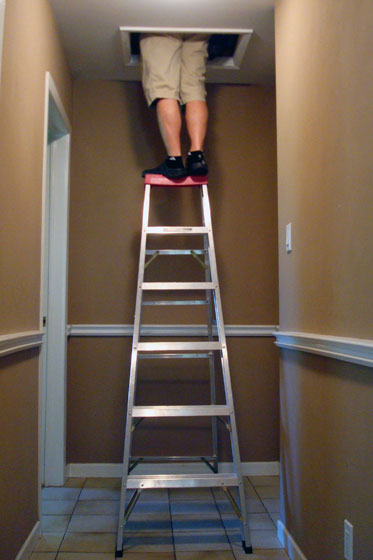
Attic hatch

Post upgrade, our energy auditor checks out the new insulation in the attic.

We did one additional upgrade that we weren’t able to squeak in before the March 31 deadline–the spray foam insulation in the basement, which happened at the start of May.

Step 4: Post-retrofit evaluation

The final step in the ecoEnergy program was the final inspection. We had until June 30 to complete this step. Matt and I scheduled our inspection on June 29, as we wanted the basement renovation to be as far along as possible before the inspector came. While none of the work we did in the basement counted towards our grant, sealing the broken windows and insulating the exterior walls all contributed to the overall air-tightness of our house.

Testing for air tightness

During the blower test, the inspector took eight readings at five different pressure points to test how air tight our house is.

Again, the inspector checked the house top to bottom, took pictures of all of our upgrades and did another blower test. We gave him copies of all of our receipts to prove that we completed the work before March 31 and filled out some more paperwork, and then we waited.

And waited.

And waited.

Then, last week, this arrived.

Cheque from the government of Canada

Money coming in, rather than going out!

Yup. We maxed it out. We got the full $5,000 we were eligible for through the program!

The results from our second inspection spell out all of the details.

Remember that the rating from our first inspection was 58. Our first report, which included tips of how to improve our energy efficiency, said, “If you implement all of the recommendations in this report, you could reduce your energy consumption by up to 57 percent and increase your home’s energy efficiency rating to 80 points… and reduce your greenhouse gas emissions [such as CO2] by 9.0 tonnes per year.”

After all of our upgrades, our final ERS was 85. We beat the estimate of how much we could improve our efficiency by 5 points! Even better, we tied the “highest rating achieved by the most energy-efficient houses” in our category.

This over-achiever is satisfied.

The grant is a very nice acknowledgement of the improvements we’ve made to the farm and our commitment to be more energy conscious. The rebates offered by the government are not enough to make someone do repairs just to get the grant, but, for people like us who are planning to do the work anyways, the grant ends up being a nice bonus.

Anyone else out there ever participated in a government grant program? What are you doing to be energy conscious in your home?

The heat is on

Fall is officially here, and I finally broke down and turned on the heat pump.

Thermostat screen

The temperature has been down as low as 17.5 over the last couple of days. Brrr.

I enjoy sleeping in the cool fall nights. With an extra blanket, I’m nice and cozy under the covers. However, once I’m out from under those covers, the cool fall mornings are uncomfortably nippy.

And now that the temperature is staying fairly cool through the days and evenings too, I was feeling the chill, even with slippers and sweaters.

Duck slippers

Matt’s slippers of choice, the ducks.

I had hoped to make it to Thanksgiving or at least the first of October before we turned on the heat, but we wimped out.

Go, go geothermal!

What about you? Have you turned on the furnace yet? Anyone else out there like their animal slippers?

Going geothermal – Air conditioning

When the Going Geothermal series concluded, I promised to return to evaluate the air conditioning component of our system.

With several heatwaves this summer, we had ample opportunities to put it to the test.

Round thermometer

When the temperature is still 28ºC at sunset, you know it’s hot. And with the humidity it felt at least 10 degrees hotter.

At the start of the summer, the geothermal heat pump had been off for several months as we hadn’t needed heat or cooling. To power it up, we simply chose our set point (24ºC) and turned the thermostat to cool.

Within a couple of minutes, the heat pump came to life and cool air was flowing out of the vents.

Thermostat

“Cool On” is what we’re looking for.

Everything was working well and we were enjoying the comfort air conditioning brings, especially after not having it for the past five years when we were living in our previous house. However, a few weeks in, things changed. A red light showed up on the thermostat a few minutes after we turned on the a/c one night.

Warning light on thermostat

I think this is a bad sign

I don’t know about you, but warning lights cause anxiety for me. Is this just a reminder that I have to clean the filter? Or is it a sign of real danger? Neither our manual nor Google were helpful in providing the answer.

With all of the dust in the house from the renovations, we knew we had to pay attention to the filter, so we gave it a good clean. No luck. The red light still glowed ominously. We shut down the whole system and turned it back on–technical, I know, but it works sometimes. Not this time.

With no solution in sight, we turned to the experts and called our geothermal installers for a service call.

It turned out that condensation was building up in the heat pump and wasn’t draining properly. Water + electricty = not a good idea, so the heat pump lit up the warning light.

The solution to the condensation was a special pump to remove the water from the system.

Condensation pump

Our new little condensation pump. The duct tape on the corner is covering a little opening that didn’t have a cap.

The pump sits on the floor beside the heat pump. It feeds the water into the clear tube at the front of the unit and then the tube runs across the utility room to a drain.

Since the installation of the condensation pump, the geothermal system has been working perfectly. When we’re running the air conditioning, the temperature of the air is very comfortable–not frigid but it cools the house very quickly.

As with the heat setting, I definitely hear the air as it circulates through the ducts and vents. The air conditioning is not excessively noisy, but it is noticeable.

We are extremely pleased with all of the features of our geothermal system and are happy we made the choice to go geo.

For previous posts in the Going Geothermal series, click on one of the links below:

Pee-eww

We’ve had a bit of an odor recently over at 129 acres, and it’s not from the manure wafting from neighbouring farms. No, this smell was coming from inside the house.

At first it was just a slight malodorous scent of sulfur. It quickly became a rank rotten eggs with a side of green onion disgusting reeking stench.

This fetid fragrance materialized every single time we ran any hot water. The two days last week when I wore my hair in a ponytail? Yep, that was because I couldn’t bear to stand in the shower long enough to wash my hair.

Thanks to Katy at Turtle House for sharing her experience with this issue, I was able to take a guess as to the reason behind the stink:

Katy’s explanation: Turns out that hot water heaters contain an element called a sacrificial anode, which is typically made of magnesium or aluminum and keeps the hot water heater from rusting (and is also a terrific name for a rock band). However, it also somehow provides excellent breeding conditions for a harmless but stank-producing species of bacteria that releases hydrogen sulfide gas as a waste product.

Stank-producing indeed.

Hot water tanks

The perpetrators

I called our geothermal folks, as they installed the hot water tanks in the first place, and pleaded for help. They gave us a few options.

  1. Wait to see if the “unpleasant odour” dissipates on its own (not happening)
  2. Insert a filtration system ahead of the hot water tank to remove sulphur, iron etc. (already did this as part of the upgrades we did to the water system)
  3. Remove the anode from the tank (making the tank more susceptible to rust and therefore shortening the life of the tank)
  4. Replace existing anode with an aluminum anode usually eliminating the oxidization and smell ($150 for new anode)
  5. Install a new fibreglass tank that has no anode ($1,000 to supply & install tank)

We chose to go with option #3. We’ll take the risk of the tank rusting over replacing our three-month-old hot water tanks or installing a new anode that might be just as attractive to these stinky little bacteria.

Removing the anodes took about an hour.

Hot water tank anode

The weapons

Given that our tanks are pretty new, I was surprised by the amount of build-up on the anodes. I’m not sure whether it’s just minerals from the water, salt from the softener or actual corrosion. The one anode is coated in a grainy white sand. The other is actually pitted pretty substantially. I’m not sure what this means for the future of our anode-less hot water tanks.

Corrosion on a hot water tank anode

On the positive side of things, our water is now odor free. We turned on the tap in the bathroom to drain the tank and went for a walk outside to avoid the stench. After giving the tank some time to refill and reheat (and lighting a vanilla candle to cover the rest of the smell), I took a wonderful, warm, unscented shower. And yes, I even washed my hair.

Going geothermal – The verdict

This is the final post in “Going Geothermal.” I’m going to evaluate our experience thus far.

In the first post of this series, I mentioned that geothermal wasn’t even on our radar when we first thought about replacing our furnace. Now, two months after the geo was installed, we couldn’t imagine choosing any other system.

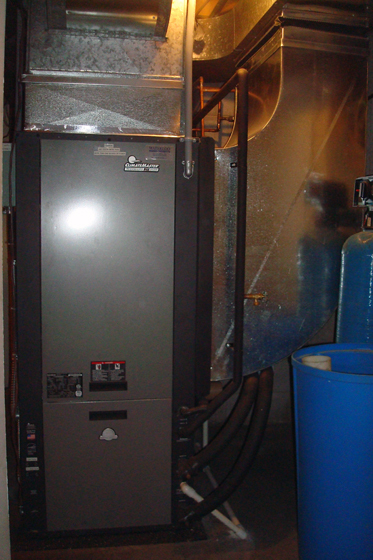
ClimateMaster heat pump

Our heat pump, complete with certification sticker from the Canadian GeoExchange Coalition

On our choice to go geothermal

Geothermal is expensive when it comes to the up front costs. We definitely paid a lot more than we would have if we had chosen to go with a traditional high-efficiency furnace, even taking into account a new air conditioner and hot water heater. Over the long term, however, we should actually save money. According to Matt’s calculations, with the savings we get from not having oil, we should be even after seven years. And after that we’ll be paying about one-third of what we would have been paying if we had an oil system.

Geothermal is a greener technology, which is important to me. I like knowing that I’ve made a responsible choice that is better for the planet than the other options that were available.

On the system

As I mentioned, our system consists of a 5 tonne ClimateMaster heat pump with a desuperheater and a 6 tonne horizontal loop. All of the elements of the system are working very well. The temperature in the house is very comfortable, and we have lots of hot water.

Early in the process of going geothermal, we were told that a geothermal system is most efficient if it can run 90% of the time. Ours definitely does not do this. It could be because it’s spring and temperatures are warmer. Or it could be because our system is slightly over-size for our house due to our plans for future expansion. I’m willing to sacrifice some efficiency to avoid upgrading the heat pump in the future when we put on our addition.

On the con side of things, I would say geothermal is slightly noisy. The heat pump itself is incredibly well-insulated, so you don’t hear the motor or other elements. However, a huge volume of air is being pushed through our ducts–more than if we had a regular furnace. As a result, I find I hear the air as it circulates, and I notice more when the system is running.

I’ve also noticed that the air seems to be dryer than it was at our old house with our gas furnace. I’m not sure whether that’s a factor of the house or of the geothermal.

On the contractor

Our geothermal contractor was Waterloo Energy Products. From the beginning with my initial phone call to their office, I was very impressed by their customer service. They answered every single one of my questions, even if they did tease me a bit about my questionnaire. From the office staff, Jim and Jason, to the on-site crew, Chris, Paul and Mike, they were all very professional, knowledgeable and helpful.

Documentation binder for our geothermal system

At the conclusion of the install, Waterloo Energy Products provided us with a binder with all of the information and documentation for our system, including site diagrams and warranties.

They are also personally very committed to geothermal and have geothermal in their own homes. Their office is an education in sustainable living, showcasing multiple renewable energy products all under one roof. If you’re at all interested in renewable energy–not just geothermal–I encourage you to visit their Sustainable Living Centre.

Still to come

The one part of our geothermal system that I haven’t evaluated yet is the air conditioning. As it’s still spring, we haven’t used it yet. However, I promise to post an update once we do. I’m sure Matt will put it to the test this summer. After five years without a/c, this is one feature of the farm that he’s very excited about.

Update: The air conditioning evaluation is now available.

For now, this concludes the “Going Geothermal” series. We’re very pleased with our decision to go with geothermal, our system and our experience with Waterloo Energy Products. I hope that this series gives you some insight into our experiences and helps those that are interested in going geothermal themselves.

If you have any questions, leave a comment. I’m happy to share more about our experience “going geothermal.”

For previous posts in the Going Geothermal series, click on one of the links below:

Going geothermal – The costs

When you’re undertaking a large renovation project, such as installing a geothermal system, you of course want to know how much it’s going to cost.

Most people want this information as early in the process as possible and so they spend time typing “how much does geothermal cost” into search engines and talking with contractors, trying to figure out what the final bill will be.

Often, it’s really difficult to find this information. Many people are uncomfortable talking finances and don’t necessarily want to share how much they pay for things. Contractors don’t want to put a number on projects until they’re able to work up a quote that’s accurate for your particular situation.

Beginning with my very first phone calls with the five geothermal contractors, I very casually asked for ballpark numbers. I found I had better success if I phrased the question gently. My approach usually sounds something like, “So what am I looking at here in terms of costs? I’ve heard it’ll be between $20,000 and $30,000.”

And for reference $20,000-$30,000 is the range we worked with in all of our early figuring for our geothermal, and we tend to always go on the high end–start with the worst case scenario and hopefully you’ll be pleasantly surprised. All of the contractors I spoke with confirmed we were likely looking in that range.

In the end, Waterloo Energy Products’ estimate for our geothermal system came in at $25,558.34.

For this we got

  • a full heat loss calculation on our house
  • all of the paperwork required for the system and for our certification submission to the Canadian GeoExchange Coalition
  • 5 tonne ClimateMaster heat pump
  • 6 tonne horizontal loop (including excavation)
  • horizontal boring from the loop field into the house
  • desuperheater for our hot water, plus two 40 gallon hot water tanks
  • 10kw electric back-up heater
  • a new programmable thermostat
  • all of the required electric, plumbing and duct work to connect it all

A big factor for us when it came to the costs for our geothermal system was also the Government of Canada ecoEnergy program. This program (which has now ended) provides a rebate of $4,375 for installation of a ground source earth-energy system (aka geothermal).

Sometimes when you’re doing a renovation, there ends up being a difference between the price you’re quoted at the beginning of the project and the price you end up paying when all of the work is done. This did not happen for us with our geothermal system. The price that Waterloo Energy Products originally quoted us was the price we paid.

So, all in, taxes, certifications, rebates, our geothermal system cost $20,883.34.

Only one more post left in our “Going Geothermal” series. Coming up next week, the verdict on our system, our contractor and geothermal itself.

For previous posts in the Going Geothermal , click on one of the links below:

Going geothermal – The installation

As I mentioned in previous entries of “Going Geothermal” (see Part 1: The decision and Part 2: Picking a contractor), we were on a tight timeline for the geothermal system, and on the third day that we owned the farm installation began.

Geothermal excavation

Waterloo Energy Products crew laying the geothermal loop.

Coincidentally, the day before installation began the oil tank also ran dry. We topped it up with diesel, and then our geo contractors spent more than an hour getting the old furnace running. They never did get the hot water tank working again.

This timing just confirmed for us that we made the right decision in going for the geo right away.

Here’s the schedule of how our installation played out.

Day 1:

Remove old pool room furnace. Move new heat pump and hot water tanks into the basement. Prep work.

Day 2:

Directional drilling. The geo system is made up of two main components: the loop field where the pipes are laid and the heat pump in the house. Somehow, the two systems have to be connected.

Option 1 for doing this is digging a trench between the loop field and the house and popping the pipes horizontally through the foundation wall, hopefully right into the utility room. In this scenario, the pipes will be about mid-way between the floor and ceiling, so if you can’t get access directly into the utility room, the pipes will have to run along the wall until they can get into the utility space. Outside you need clean access to the foundation, which means no patios or other obstructions between the loop field and the spot that you want to go through the foundation.

Option 2 is directional drilling (also known as horizontal boring) where a special drill rig tunnels in from the field under the foundation (and in our case under a patio and under a sun room) and pops up through the floor of the utility room. It’s a very clean installation, but you pay extra for the convenience of not having a big trench running up to your foundation.

Geothermal pipes

The geothermal lines entering and exiting the utility room.

Also on day 2 our contractors removed the (non-functioning) hot water tank and the house furnace.

Day 3:

The Dig. This was the part I was most excited about. For our 6 tonne loop system, our contractor dug three trenches 300 feet long, 5 feet deep and 5 feet wide. It was a huge excavation. Fortunately, we have a lot of property and our contractor had a big excavator.

For some context picture me driving up to the farm at 7:45 in the morning (we weren’t living there yet) and seeing a giant machine toddling through the field behind the barn. It actually looked like it was picking its way delicately along. Of course, that illusion did not last as 15 minutes later the shovel was in the ground and digging had begun. One scoop of his shovel was a full 5 feet across.

Geothermal excavation

The progress after just 15 minutes of digging.

He started digging at 8 a.m. and by 3 p.m. the loop was fully installed, the trenches were back-filled and the machine was on its trailer heading away down the driveway.

Geothermal excavation

Two-thirds of the loop down, one-third to go. The mounds of earth you see in the centre and at the left of the picture are the two completed trenches which run for 300′ long. The third trench is coming around behind the run-in shelter. If you look closely, you might be able to see the green pipes ready to be laid in the open trench.

While the Waterloo Energy Products crew was working out in the loop field, another contractor finished all of the duct work inside, including tying the new system in to the pool room. Our system also includes a 10kw electrical back-up unit (in case anything goes wrong with the heat pump) and by the end of day 3 it was chugging away and we had heat and hot water in the house again.

Day 4:

Inside installation, including connecting the heat pump into the loop. By the end of the day, I had my favourite email from my WEP crew: “You are running on geo as of now!” Throughout the installation the crew was great at keeping me updated on their progress, letting me know what time they were coming the next day and what was next on the schedule.

Climate master heat pump

Look how shiny! Our 5 tonne heat pump by ClimateMaster. (Ignore the old, decidedly not shiny water softener in the corner.)

Day 5:

Finishing touches and tweaks. Final hook-ups of hot water tanks (we have a desuperheater unit that captures excess heat from the heat pump and uses it to supplement hot water generated by our main electric hot water heater, hence the two tanks).

Hot water tanks

Day 5 also saw removal of our old air conditioner. One nice thing about the geothermal system is that there is no equipment outside. The loop is buried in the ground and the heat pump and hot water tanks are tucked away in the utility room.

And for a utility room, it looks pretty good. Everything is neat and tidy and very well placed. Every tour of the house now includes a stop to admire the geothermal system.

Coming up next in “Going Geothermal,” the question everyone most wants to know: the cost.

For previous posts in the Going Geothermal series, click on one of the links below:

Going geothermal – Questionnaire

Here is the list of questions I asked all of our geothermal contractors. Click here for the post on how we picked our geothermal contractor.

  1. How many geothermal systems have you installed?
  2. What types of systems do you install most (horizontal, vertical, closed, open)?
  3. What are the most common problems you encounter?
  4. Do you subcontract any of the work?
  5. How do you calculate heating/cooling load?
  6. What should we consider in planning for an addition to the house?
  7. Will you do locates for all of the utilities?
  8. What heat pump do you use?
  9. How much area do you need to dig?
  10. How far from the house can the system go?
  11. Are you able to install the loop on unlevel ground? (The answer to this one is yes)
  12. What are the electrical requirements for the system? Can you upgrade the electrical if it’s required?
  13. What changes to the duct work will be required?
  14. What hot water system do you use? How does the hot water system work?
  15. How long does installation take?
  16. When are you able to book the installation?
  17. How many people will be on site for the install?
  18. How does service and maintenance work?
  19. What warranties are on the system?
  20. Will you remove the existing furnace, air conditioner, hot water heater, oil tank?
  21. Do we need to have the ducts cleaned? Do you take care of this?
  22. Where will the thermostat be? How does the thermostat work?
  23. Does the weather affect the system?
  24. Does the type of soil affect the performance of the system? (The answer to this one is no, but the wetter the soil the more efficient the system)
  25. Do you take care of CGC certification? Is there a cost for this? (Certification from the Canadian GeoExchange Coalition is a requirement of the ecoEnergy program)
  26. What forms of payment do you accept?
  27. References?

I found these questions were a good way to learn about our system and understand geothermal technology. I tried to integrate the questions into our conversation during the site visits, rather than quizzing the contractors one question after another. Seeing how the contractors responded to all of my questions gave me an idea of their overall approach to customer service as well.

I guess you can call me a demanding client, but I believe when I’m making an investment, especially when it’s as big as a geothermal system, I want to know exactly what to expect and what I’m getting.

For previous posts in the Going Geothermal series, click on one of the links below: